Create your first project
A project is the container for everything you evaluate about one AI system, its test plans, datasets, connectors, runs, and traces.
Last updated 2026-08-28
Everything in EvaliQA lives inside a project. A project represents one AI system you want to evaluate, a specific chatbot, a RAG assistant, a voice agent, an internal classifier. All the test plans, datasets, connectors, eval runs, and live traces you build for that system are grouped under its project, and reports and KPIs are scoped the same way.
The screencast (0:45) creates a project and walks its detail page.
If you only ever evaluate one product, you'll have one project. If your company ships several AI systems, you'll typically have one project per system so results stay comparable and don't bleed together.
What a project holds
- Test plans: the definition of "how we score this system."
- Datasets: the inputs you score against, versioned.
- Connectors: HTTP integrations to call your agent (Postman-style).
- Eval runs: every execution of a test plan lives here.
- Traces: production traffic from the SDK.
- Reports: the human-readable write-ups of finished runs.
- API keys for the SDK: one set per project (see the Tracing tab).
Create a project
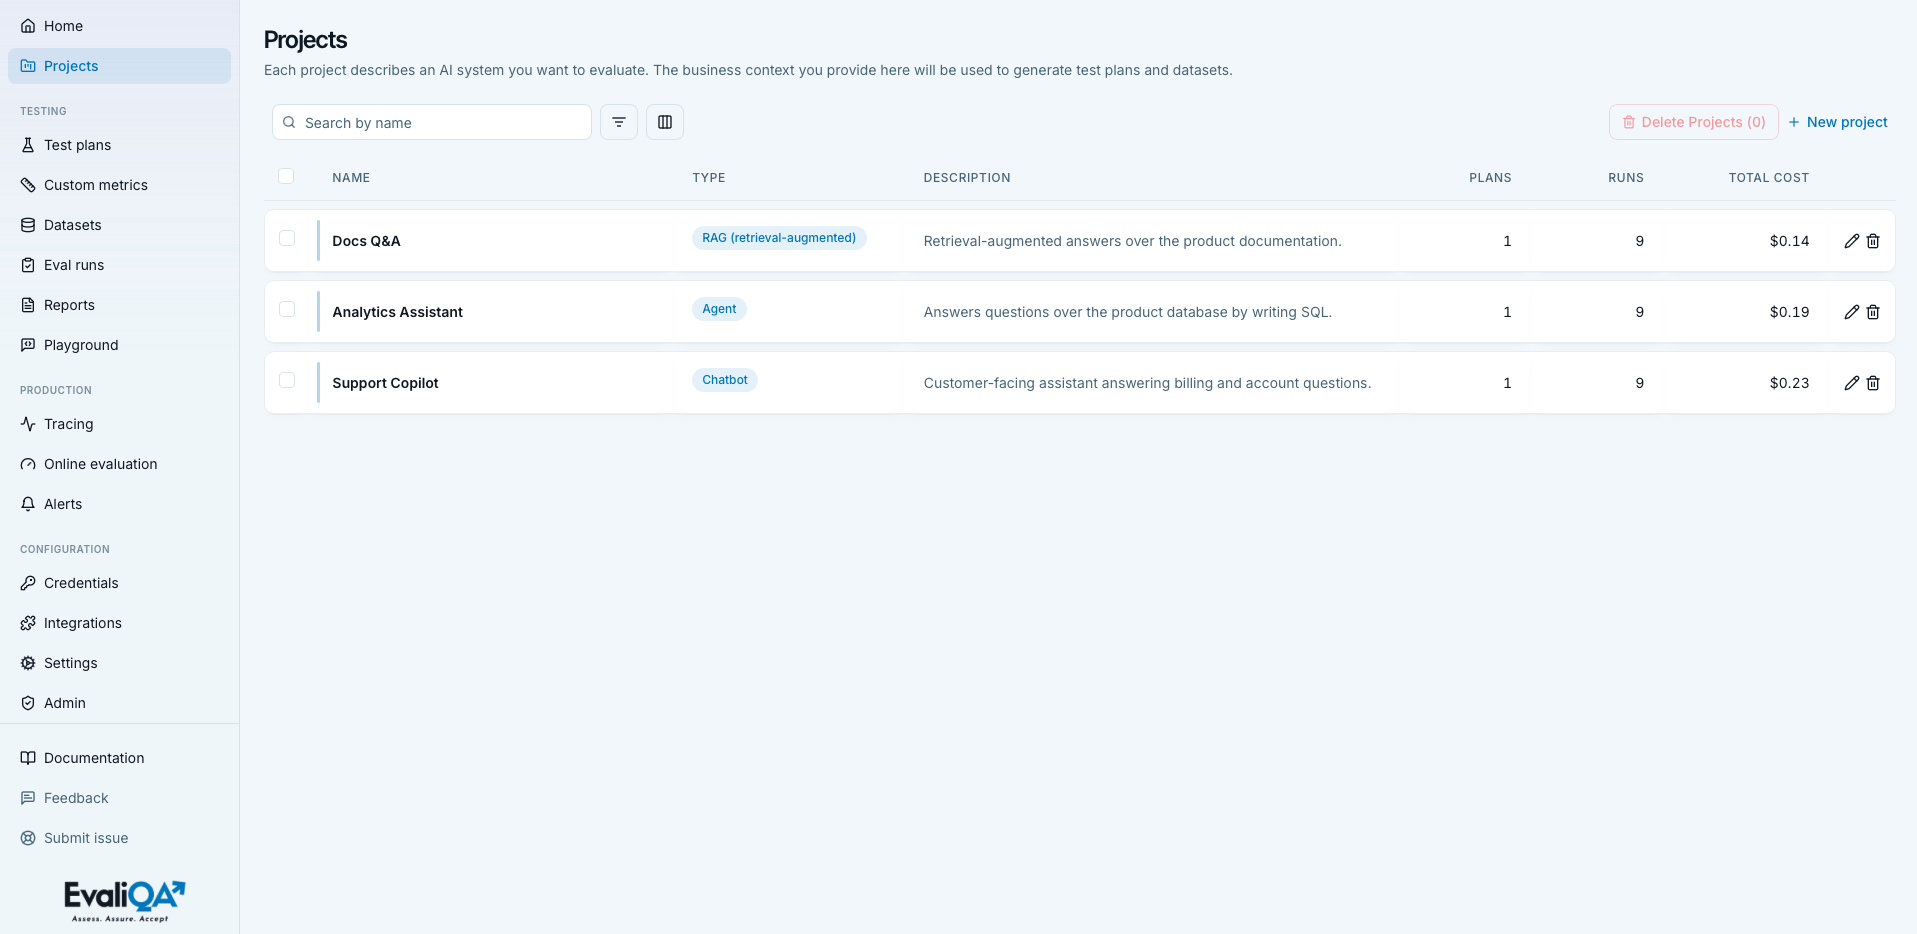
If you arrived from the onboarding checklist, the New project drawer opens automatically. Otherwise, open /projects and click New project in the top-right of the toolbar (or use the CTA in the empty-state card if this is your first one).
The drawer is grouped into three sections. Only Name and Type are required; everything else is optional but influences what EvaliQA can do for you automatically.
Section 1: Basics
- Name: a short, human-readable label. This is the title you'll see
everywhere (sidebar, breadcrumbs, dropdowns, reports). Up to 120
characters, and it must be unique inside the workspace. Examples:
Support bot v2,Sales-assistant-RU,Docs Q&A. - Type: pick the option that best describes the system:
- RAG (retrieval-augmented): an assistant that grounds answers in retrieved documents.
- Agent: a system that uses tools, calls APIs, takes actions.
- Chatbot: a general conversational assistant.
- Classifier: takes text in, returns a label / category.
- Summarizer: takes long text in, returns a shorter version.
- Voice bot: a spoken agent (STT → LLM → TTS).
- Other: none of the above fits cleanly. The type isn't a hard constraint on what you can do, it's a hint for the test-plan generator (retrieval quality for RAG, tool-use correctness for Agent, intent accuracy for Classifier, and so on).
- Description: one to three sentences summarising what the system does and why it exists. Optional, but this is the single most important free-text field for the AI-assisted test-plan generator later. The more specific you are, the more relevant the generated test cases.
Section 2: Context
- Domain / industry: e-commerce, healthcare, fintech, legal, gaming, and so on. Used to steer domain-specific vocabulary and compliance considerations in generated tests (PII in healthcare, pricing rules in e-commerce, KYC in fintech).
- Target audience: who talks to the system. End users, support agents, clinicians, dev-ops engineers. Shifts tone and edge cases in generated inputs (clinicians tolerate jargon, end users don't).
- Languages: a chip input. Type an ISO code (
en,es,de,ru,zh), press Enter. Add as many as you support. Generated tests will be written in these languages, including bilingual switching cases when more than one is present.
Section 3: Scope
Three chip lists that describe what the system does and, importantly, what it must not do:
- Key business scenarios: concrete user intents your system must
handle, from the user's point of view. Examples:
ask for a refund,track an order,book a consultation,escalate to a human. Each scenario becomes a category of test cases. - Key capabilities: what the system can do under the hood: tools it
can call, data sources it can query, actions it can perform. Examples:
look up order in Postgres,send confirmation email,refund via Stripe. Different from scenarios: scenarios are the what, capabilities are the how. - Out of scope: things the system must not do. Topics to refuse,
advice it can't give, actions it mustn't take. Examples:
give medical advice,discuss competitors,refund without approval. These generate guardrail tests that check the system declines gracefully.
Save
Click Create project. The drawer closes, the row appears at the top of the list, and you can open it right away to start attaching test plans and connectors.
The project detail page
Clicking a row on /projects takes you to /projects/{id} with four tabs
along the top:
- Overview: dashboard for this project (see below).
- Test Plans: the test plans scoped to this project, using the same table and creation wizard as the workspace-wide /test-plans page.
- Connectors: HTTP integrations for calling your agent, think Postman collections. Set up here so a test plan can invoke the system under test.
- Tracing: SDK API keys for this project and the auto-eval configuration for production traces. See Runtime tracing setup.
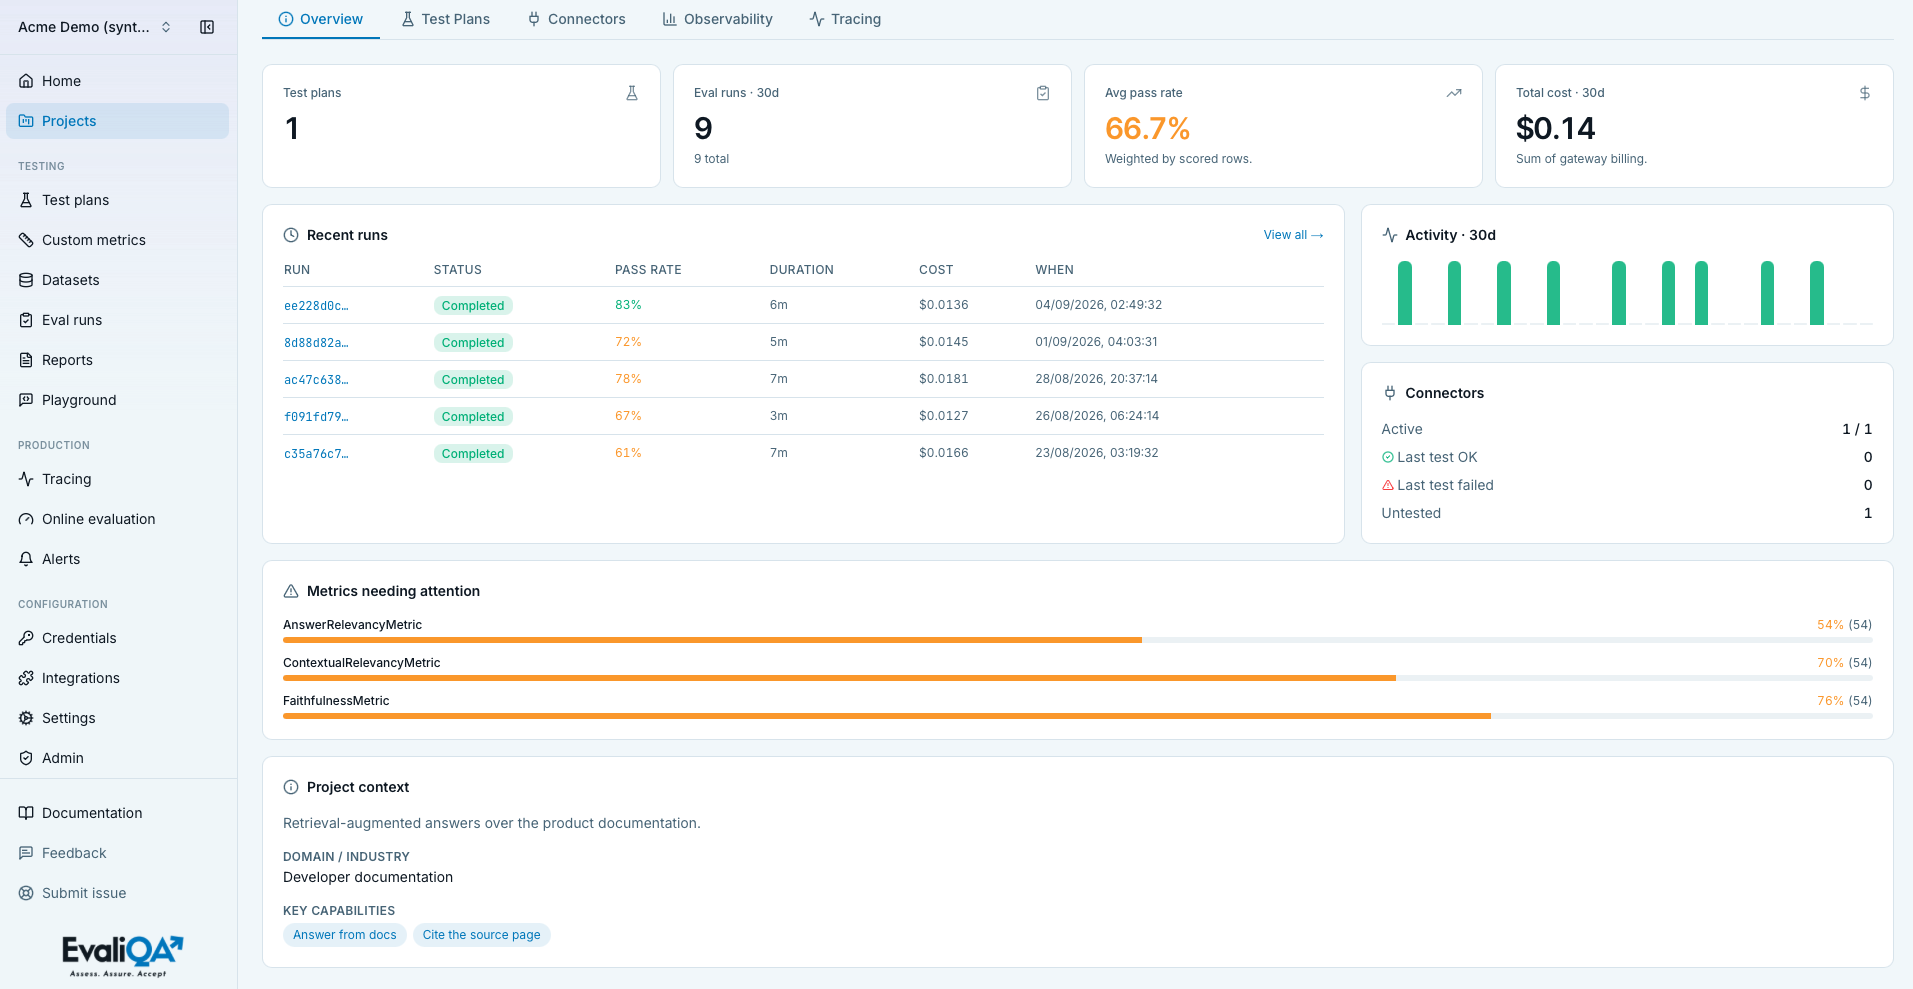
The Overview tab
Shows a compact dashboard scoped to this project only:
- Four KPI tiles: test plans (all-time), eval runs (last 30 days), average pass rate (last 30 days), total cost (last 30 days).
- Recent runs table, click any row to jump into the run's results.
- 30-day activity strip: runs per day so you can spot a quiet week or a sudden spike at a glance.
- Connectors health: how many of this project's connectors are healthy, degraded, or failing.
The header of the page shows the project name, its type badge, and two buttons: Share (visible only to workspace Owners and Admins, see Sharing) and Edit project (opens the same drawer as creation, prefilled).
Managing the projects list
The /projects page has the same toolbar as the rest of the app:
- Search: filter by name as you type.
- Filter: build one or more rules with the popover:
- text columns (Name, Description, Domain, Languages),
contains,equals - Type,
equals, with a dropdown of the seven types - number columns (Plans, Runs, Total cost),
equals,greater than,less than - Multiple rules combine with AND.
- text columns (Name, Description, Domain, Languages),
- Columns: 10 optional columns to toggle: Type, Description, Plans, Runs, Total cost, ID, Domain, Languages, Created, Last updated. Name is always visible. Type / Description / Plans / Runs / Total cost are on by default; the rest are opt-in.
- Bulk delete: tick multiple rows and use Delete Projects (N) in the toolbar.
Rows are clickable, clicking anywhere on a row opens the project (the Edit and Delete icons on the right stop click propagation).
Sharing a project
By default, every member of a workspace can see every project in it. If you have OWNER or ADMIN role on the workspace, you can restrict a project so only some members can access it:
- Open the project detail page.
- Click Share in the top-right.
- The sheet lists every workspace member with a per-user access toggle.
- Turn the toggle off to deny access; turn it on to restore it.
Workspace Owners and Admins are locked on: you can't deny them from here, because their workspace role already grants them access to everything. Restrictions are per-project, so denying a Member from Project A leaves their access to Project B unchanged.
If you don't see the Share button, your workspace role is Member or Viewer. Ask an Owner or Admin to change the project's visibility.
Editing a project
Two ways to open the edit drawer:
- From the list: pencil icon on the row's right edge.
- From the detail page: Edit project button in the header.
The same drawer is used for create and edit; on edit, every field is prefilled and the submit button reads Save changes. Editing scope fields (scenarios, capabilities, out-of-scope) doesn't retroactively change already-generated datasets or test plans, those stay as they were. New generations pick up the updated context.
Plan limits
Number of projects per workspace is plan-limited:
- Free: 2 projects.
- Team: 10 projects.
- Enterprise / custom: unlimited.
When you hit the cap, a warning banner appears above the list with an Upgrade plan button and a Compare plans popup. The New project CTA becomes disabled until you upgrade or delete a project. See Billing for pricing details.
Deleting a project
Click the trash icon on a row (or select several and use the toolbar Delete Projects button). A confirmation sheet appears with a cascade summary of what will be removed:
- All test plans scoped to this project.
- All datasets attached to those test plans.
- All eval runs for the project, along with their traces.
This is a hard delete, there is no undo. If you just want the project out
of the way temporarily, edit it and prefix the name with [archived], or
move the traffic to a different project via the SDK config.
Deleting a project does not delete credentials, those are workspace- scoped and stay put.
Common problems
"Name is already in use in this workspace" on Save.
Project names must be unique per workspace. Add a suffix (-v2, -staging)
or delete/rename the old one first.
The Share button isn't there. You need OWNER or ADMIN role on the workspace to share a project. Members and Viewers can still see everyone who has access via the workspace member list.
Auto-generated test cases feel generic. That's usually a signal the project's Context and Scope sections are thin. Open Edit project and fill in the domain, target audience, business scenarios, and out-of-scope list, then regenerate. The AI has much more to work with.
I hit the plan limit but I don't need a new one, I need to move a
project. Projects are workspace-scoped and can't be moved between
workspaces yet. The workaround is to export the datasets you care about
(.csv from the Datasets page), create the project in the target
workspace, and re-import. Runs and traces don't carry over.
What's next
You have a project. The next step is to hook up a test plan and a dataset, pick a model, and hit Run: see Run your first evaluation.